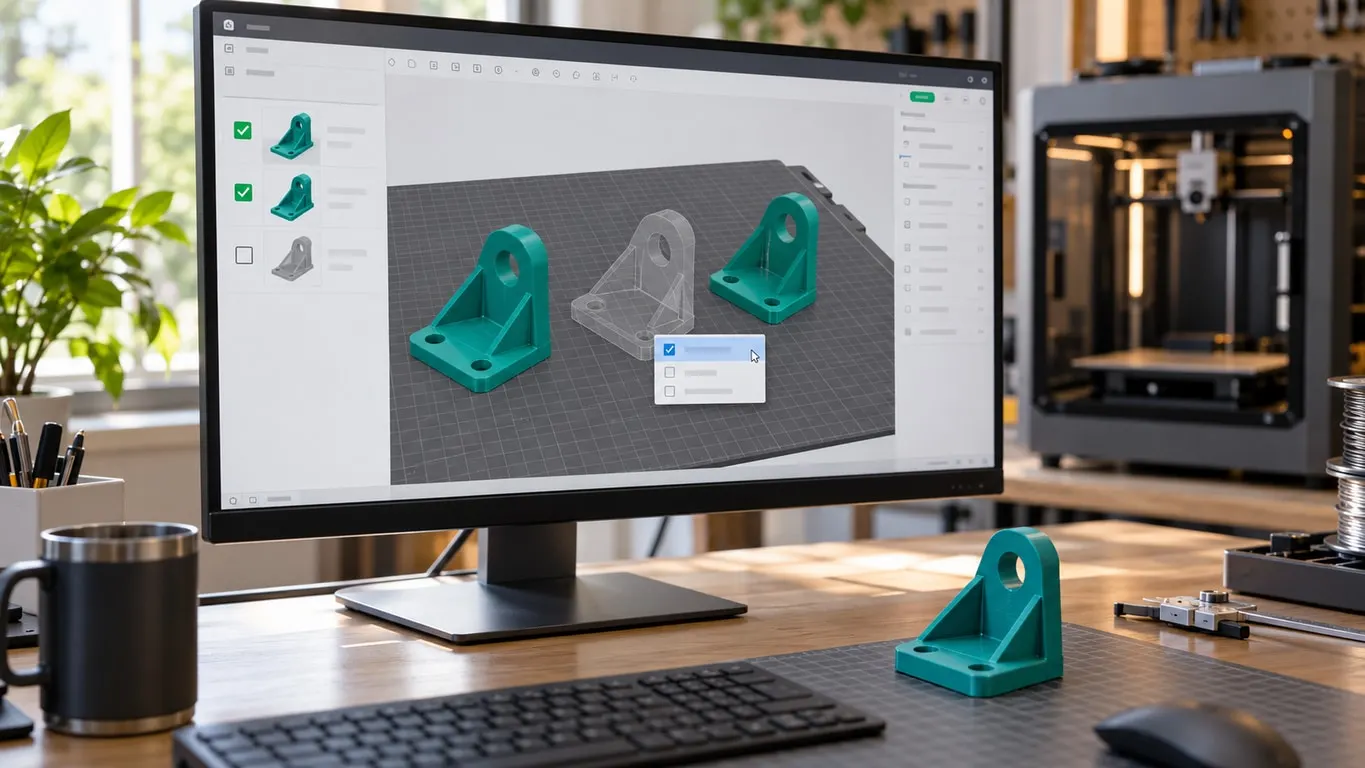
When an object shows transparent in Bambu Studio and then disappears the moment you slice, its Printable flag is off. Bambu Studio renders an object it has been told not to print exactly that way, so nothing is broken: right-click the object in Prepare, click Printable so it gets a check mark, and it comes back in its filament color.
This tends to show up in projects downloaded from MakerWorld. Open a multi-plate project, and on one plate a couple of pieces look washed out while the rest are normal. Print the plate anyway and those pieces simply never print.
The quick fix:
- In Prepare, right-click the see-through object.
- Click Printable in the menu. A check mark appears next to it and the object takes on its filament color again.
- If several objects are off, select them all, right-click, and use the same item to switch them on together.
- Hit Slice plate and confirm the objects now appear in Preview.
A switched-off object, not a broken file
Start with what Printable actually does. When it is off, the slicer drops that object's instances before slicing even begins. No toolpaths get generated for it, so it never shows up in Preview, never reaches the G-code, and is not on the plate when the job finishes. Everything else on the plate prints as usual.
How it looks on screen depends on your theme. Bambu Studio ignores the filament and paints an unprintable object with one fixed color, defined in the source as UNPRINTABLE_COLOR: black at 50% opacity. Lighting adds almost nothing to black, so what you mostly see is the background dimmed by half.
On the light theme that comes out as a mid gray shell with the plate showing through. On the dark theme it is a dark, nearly black shadow, easy to mistake for a dark filament. Painted colors from Color Painting are hidden as well.
The behavior is old. Version 1.9.7.52, released in September 2024, already used this color and had the same right-click item, and the stable 2.8.2 from August 2026 is no different. The betas add two hints: in the 2.8.3 beta source, hovering over an unprintable object shows an Unprintable object tooltip, and the 2.8.4 beta release notes add a warning when only non-printable objects are left on the plate. On stable 2.8.2 neither exists, so color is the only clue in the 3D view, and color can mislead, as the translucent filament case further down shows. The empty checkbox in the object list is the reliable test.
Turning it on from the object list
The object list in the left panel is often quicker than hunting for the object in the 3D view, and it does not depend on the theme. Each object has a checkbox column to the right of its name: a filled green box with a white check mark means printable, an empty box with a green outline means off.
Clicking the box flips the state. On stable 2.8.2, on every system except macOS, its tooltip says as much: Click the icon to toggle printable property of the object. In the 2.8.3 and 2.8.4 betas, hovering over an empty box shows Unprintable object instead.
To switch several objects at once, right-click. Select them, right-click, and Printable is in the menu again. If every selected object is on, it switches them all off; if even one is off, it switches them all on.
Objects with copies get an Instances group row underneath them, with the copies listed as Instance 1, Instance 2 and so on. Each of those rows has its own checkbox, so you can switch copies off one at a time. Right-clicking an instance row does not offer Printable, so use the box there. The box on the object row changes all instances together.
One limit is worth knowing. Printable works on objects and instances, not on individual parts. Right-click a single part inside a multi-part object and the item is not there. So if only one part of an object looks transparent while the rest is solid, the cause is something else; check the part types in the table further down.
Who switched it off, and should you switch it back on
Before turning everything on, take a minute to look at what you are about to print. In a four-plate project the switched-off pieces may all sit on one plate. Step through the plates and see whether a gray piece matches something already printing elsewhere. An alternate version often sits right on top of the part it replaces, so dragging the switched-off piece to an empty spot first makes it easier to see what it is and keeps two overlapping parts from printing fused together.
The project description and the print profile notes usually explain the choice. Typical reasons are an alternate version at a different size or tolerance, an optional accessory, a spare, or a duplicate of a part on another plate, though without a note that is guesswork. The difference between a model and a print profile is covered in what a print profile is.
Why it arrives switched off is simple: the Printable state is saved in the 3MF, where every object instance carries a printable attribute. On MakerWorld the person who uploaded the model and whoever uploaded the profile can be different people, and the state travels with the profile's 3MF. Your own settings have nothing to do with it.
If the hidden piece turns out to be an exact twin of another one, switching it on gets you two. When unsure, switch it on, slice, look at Preview, and switch it off again if you do not need it.
Things that look transparent on purpose
A few things in the 3D view are semi-transparent by design. Some are helper volumes that never print; others only change how the model is displayed. None of them has a switch you need to flip. Colors are from the source code definitions.
| Looks like | What it is | Prints? |
|---|---|---|
| Yellow tint, 60% opaque | Modifier, applies different settings to the region inside it | No |
| Red tint, 40% opaque | Support Blocker, keeps support out of that volume | No |
| Blue tint, 40% opaque | Support Enforcer, forces support inside that volume | No |
| Gray, 40% opaque; lighter than an unprintable object on the light theme | Negative Part, its volume is subtracted from the object | No |
| Black, 50% opaque; gray on the light theme, nearly black on the dark one; no filament color | An object with Printable off | No |
The bottom two rows are the ones that get confused on the light theme. Check the object list: a negative part is a part row under an object whose other parts keep their normal color, while an unprintable object is its own row with an empty checkbox and is one flat tone all over. How to add one is in adding a negative part, and blocker and enforcer volumes are covered in adding supports. If a part became one of these types by accident, right-click it and use Change type to set it back to Part.
Two display states also change the look without touching the print:
- Translucent filament. A filament color that carries transparency is drawn with that transparency. Showing Bambu's transparent filaments as see-through in the 3D view arrived with the 1.7.0 beta in July 2023, and a color that is almost fully clear is drawn as white at 30% opacity so the object does not disappear. On the dark theme, stable 2.8.2 can show translucent filament as black, a bug the 2.8.4 beta release notes list as fixed. A near-black object on the dark theme is therefore not proof of anything; check its checkbox. This object still slices.
- Support painting. Open Supports Painting and the selected object turns flat gray while the other objects are hidden, sometimes with the notice Only the object being edited is visible. The Bambu wiki says the gray is there so painted areas stand out. Leave the tool and the view returns to normal.
When the object crosses the plate edge
The giveaway here is a line. If the darkening starts exactly at the plate boundary, or at the height limit, and the rest of the object keeps its normal color, the object is hanging out of the build volume rather than switched off. An unprintable object is one tone from end to end.
Bambu Studio confirms it with a warning headed Following objects are laid over the boundary of plate or exceeds the height limit:, which names each object and asks you to move it totally on or off the plate. Drag it back inside and both the shading and the warning go away.
An object sitting entirely off the plate keeps its normal color, because the shading only applies to objects straddling the boundary. It looks fine, but it is not part of that plate's slice.
Under the hood, the shader mixes the color of every point outside the limit one third of the way toward black.
Missing in Preview is a different problem
Everything above is about what you see in Prepare. If an object looks complete and in its normal color in Prepare but a wall or a thin section is missing in Preview, Printable is not the issue. The slicer could not fit a line into that region, and line width is the cause; the fix is in the skipped thin walls article.
So the split is simple. See-through in Prepare with an empty checkbox means the object is switched off, so switch it on. Complete in Prepare but missing in Preview means the slicer is skipping it, so look at line width.
Either way, after slicing, go back to Preview and check the piece is actually there before you send the job.