If you went looking for a G-code viewer in Bambu Studio's menus, you will not find a separate one there; the menu entries that would open it are switched off in the source code. The viewer is the Preview tab, and the part that walks a layer move by move is the horizontal slider along its bottom edge.
To look at a .gcode file you already have, drag it onto the Bambu Studio window. The source routes .gcode and .g files dropped that way straight into Preview. Only one file opens at a time, and it will not load if you drop it together with a model. In that mode the right-click menu on the vertical slider is disabled, Jump to Layer included.
That is what a Simplify3D user asked about on the Bambu Lab forum in June 2024, in the thread "In Preview view individual g-code motions in Bambu Studio". Simplify3D let them switch the preview from layers to line-by-line. Did Bambu Studio have anything similar?
What the forum thread got right
ElektroQuark replied six minutes in:
In PREVIEW -> Color Scheme you can select:
Travel Retract Unretract Wipe Seams
Then use the bars to view the individual layers.
The accepted answer came from JonRaymond, who quoted a post of their own from October 2023:
In the "Preview" tab of BS, the bottom slider will show you every line of gcode for the layer that you select on the vertical right hand layer slider. Very handy for understanding what the printer is doing and learning about gcode.
They added one line: "The left and right error keys can be used to step through each line or if you mouse over the bottom slider you can use the scroll wheel." "Error keys" is a typo for arrow keys. The original poster replied that this was exactly what they wanted.
Both replies still hold. Version 1.9.3 came out on June 21, 2024, four days before the thread, and its source already had the same shortcut list, the Color Scheme heading and those five options; the 2.8.2 stable release from August 2026 has them unchanged. What the source adds is two corrections, and both change how you use the slider.
The bottom slider steps through moves, not lines
The steps are the moves Bambu Studio extracts when it parses the file: straight and arc moves, retracts and unretracts, wipes, seam points. A temperature or fan command that produces no motion is not a step, and neither is a comment. Filament changes, pauses and custom G-code are recorded too, but no legend row turns them on, so the slider never lands on them either. You see all of those lines in the G-code panel, around the highlighted one.
The bigger catch is visibility, and it depends on which viewer you are running. With Enable advanced gcode viewer on in Preferences, the default unless your graphics card is below OpenGL 3.1, the step list is built from visible moves only: hidden types and line types you switched off in the legend are skipped, and only extrusions and Seams start out visible, so Travel, Retract, Unretract and Wipe do not count as steps until you turn them on. That makes ElektroQuark's answer the useful half. The legacy viewer counts every move between the first and last visible one, hidden ones included, and starts with Seams off as well.
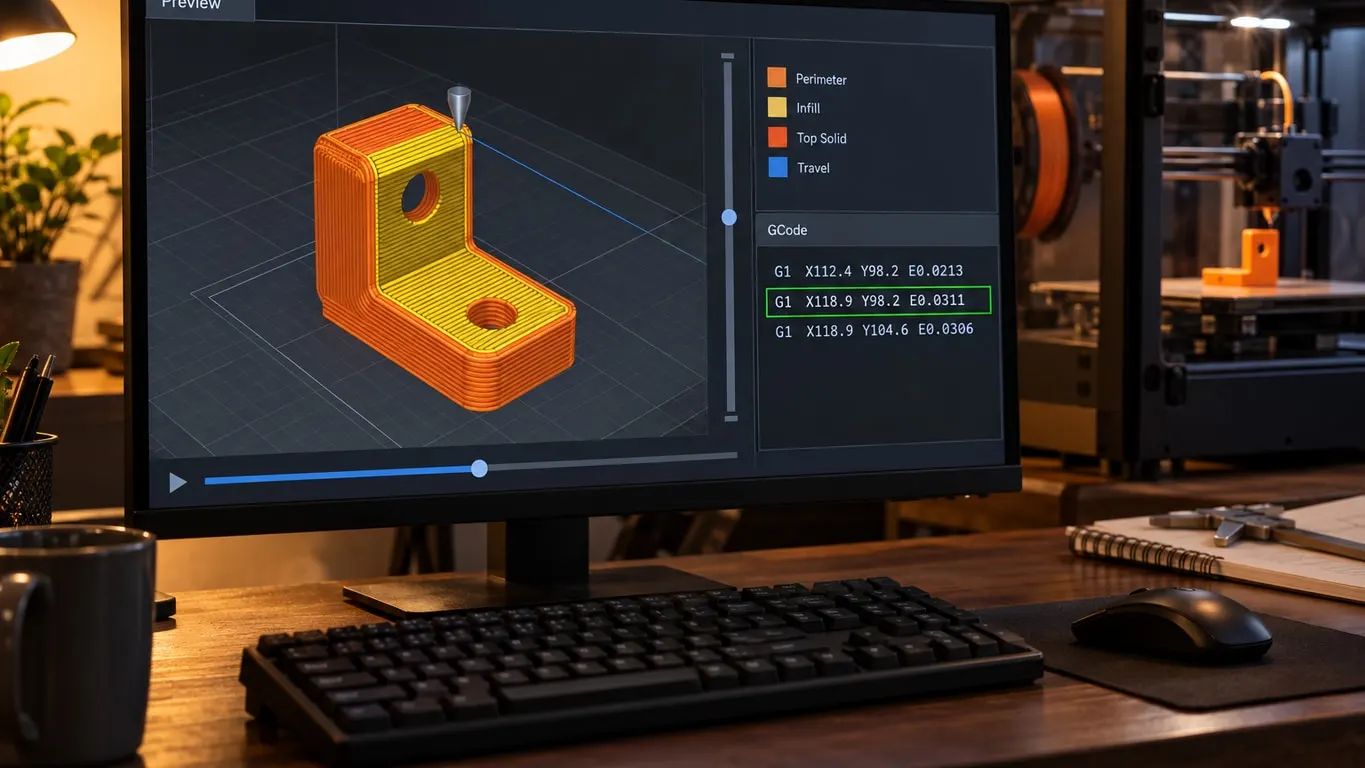
With the thumb parked at the far right, the layer is drawn complete. Pull it left and the selected layer is drawn only up to that move, with the nozzle model sitting on the spot. The number beside the thumb is the step's position within the layer, not a line number in the file.
Where the G-code line shows up
A panel titled GCode appears on the right, just under the legend, the moment the thumb leaves the right end. Hovering has nothing to do with it. Line numbers are green, the current move's line sits in a green frame, and the command, parameters and comment come in different shades, with anything past 40 characters cut off by "...". What the letters mean is in the G-code explainer. The download has no key that hides the panel: the source binds C to a toggle only in builds not meant for public release. Send the thumb back to the far right and the panel goes away.
A smaller readout sits at the bottom center, above the slider, with the nozzle's X, Y and Z. Whether a value joins the coordinates depends on the color scheme:
| Color scheme | Shown next to the position |
|---|---|
| Summary, Line Type, Filament | X, Y, Z only |
| Speed, Layer Time | Speed or layer time, on every move |
| Layer Height, Line Width, Flow, Fan Speed, AUX Fan Speed, Temperature | That value, on extrusion moves only |
Keys, modifiers and the scroll wheel
The Preview section of the Keyboard shortcuts window, word for word:
| Key | Description in the list |
|---|---|
| Arrow Up | Vertical slider - Move active thumb Up |
| Arrow Down | Vertical slider - Move active thumb Down |
| Arrow Left | Horizontal slider - Move active thumb Left |
| Arrow Right | Horizontal slider - Move active thumb Right |
| L | On/Off one layer mode of the vertical slider |
| Shift+Any arrow | Move slider 5x faster |
| Shift+Mouse wheel | Move slider 5x faster |
| Ctrl+Any arrow (command on a Mac) | Move slider 5x faster |
| Ctrl+Mouse wheel (command on a Mac) | Move slider 5x faster |
Here is how the source wires the keys. Left and right always drive the bottom slider, up and down always drive the layer slider, and holding Shift or Ctrl (Command on a Mac) turns each press into a five-step jump. The keys only reach Preview while the 3D view has focus, so if the arrows seem dead, click an empty part of the view.
The scroll wheel is pickier, which is why JonRaymond said to mouse over the bottom slider. It moves a slider only while the pointer is inside that slider's area: over the bottom one it steps through moves, over the vertical one it changes layers. On a Mac, use Control, not the Command shown in the list, for the five-step wheel jump; the Mac branch of the wheel code checks only Shift and Control.
For a distant layer, right-click the vertical slider's thumb (the one with the + on it) and pick Jump to Layer; if the layer already carries a marker, you get the edit menu instead, without that entry. That menu also adds pauses and custom G-code, which changing temperature at a layer walks through. L, or the small button at the bottom right, isolates the selected layer.
Turning on travel, retract, wipe and seams
The legend in the top right still carries the bold heading Color Scheme. Its dropdown lists Summary, Line Type, Filament, Speed, Layer Height, Line Width, Flow, Layer Time, Fan Speed, AUX Fan Speed and Temperature; Summary and AUX Fan Speed were not there in 1.9.3, and AUX Fan Speed is dropped from the list when the preset is not a Bambu one or the printer model's profile marks the side panel fan as unsupported. After a Helio thermal analysis, Thermal Index (min), (max) and (mean) join the list.
Travel and the other four are not dropdown entries. Pick Line Type and they appear as rows beneath the extrusion types, each with a toggle in the Display column:
| Row | What it marks | Drawn as | At startup (advanced viewer) |
|---|---|---|---|
| Travel | Moves without extruding | Blue line | Hidden |
| Retract | Where filament is pulled back | Magenta marker | Hidden |
| Unretract | Where it is pushed forward again | Light blue marker | Hidden |
| Wipe | The nozzle wipe move | Yellow line | Hidden |
| Seams | Where a loop starts | Light gray marker | Shown |
The colors come from the source's color table. The Filament view lists the same five rows under an Options heading, and the Speed view has a travel row only; where travel speed is set is in the print speed article. Other views have none of them.
Once Travel and Retract are on, go back to the bottom slider: every travel and every retraction is now its own step, so you can follow the nozzle from one wall to the next and see where it pulls filament back. In Line Type, the Travel row also gives the time spent traveling and its share of the total. A Preview that opens black or empty is a different problem, not covered here.